Sharpening a shechita knife (aka chalof or chalif) is a specialized skill that requires precision, patience, and the right tools and methods.
This post provides an overview of the tools and techniques used for knife preparation and ongoing maintenance. While it covers many important details, it is does not remotely cover everything you need to know. If you’re just interested in general knife sharpening or not planning to perform proper kosher slaughter, online tutorials may be enough. But if you’re looking to become a lay or professional shochet, hands-on training is just as essential as learning the halachos.
Knife sharpening is arguably the hardest part of shechita—and the quality of your teacher can make all the difference. We’ve seen many students waste months going in circles with teachers who don’t know how to transmit the information effectively, only to come to us and start over from scratch. With the right guidance, most of our students learn to sharpen properly in just 5 to 15 hours!
Regardless of who you learn from, we strongly recommend learning from a qualified shochet who understands how to properly form a burr. If your teacher doesn’t know how to make a burr, find someone else. If a shochet doesn’t understand how to make a burr (and sadly there are many who do not) they don’t understand the very basics of knife sharpening.

KNIFE PREPARATION
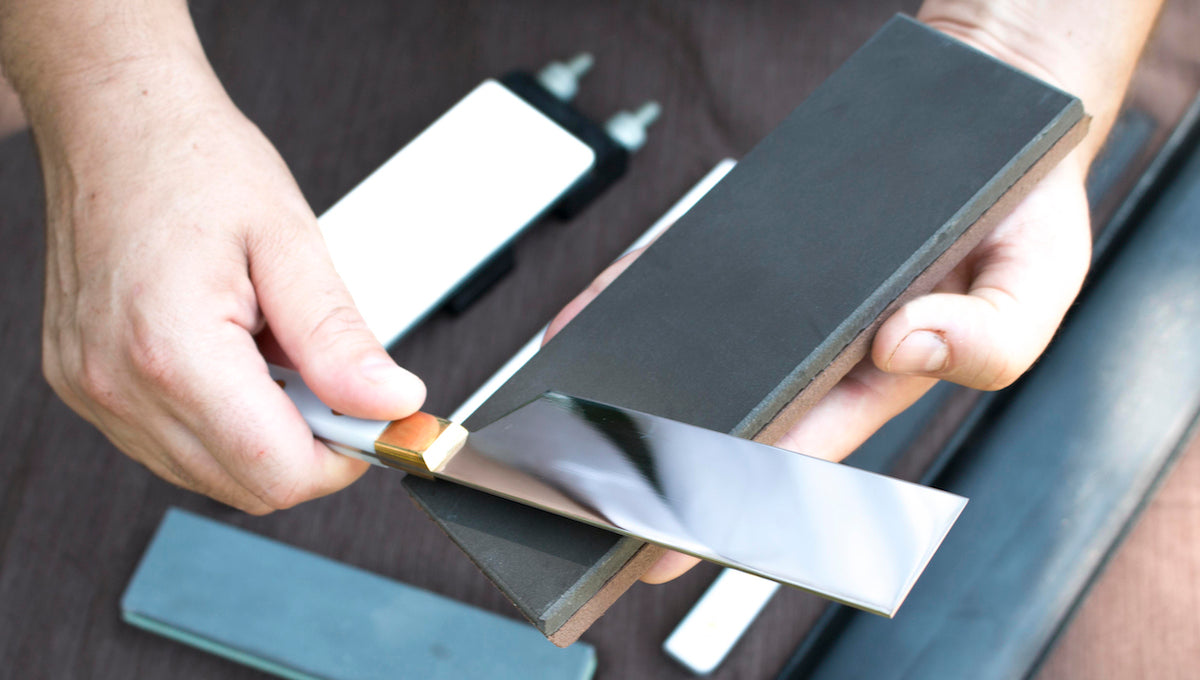
Safety First! Before we get into the details of shechita knife sharpening, it’s important to address a major safety concern commonly encountered in the kosher slaughter world. Unlike in general knife sharpening—where the stone is typically placed on a table—it’s standard practice during shechita knife prep for the shochet to hold the sharpening stone in one hand. This method carries significant risk. If sharpening this way, always wear a cut-resistant glove on the hand holding the stone.
Step 1: Make a Burr
Use a low-grit stone (220–250#) to form a burr on both sides of the edge. This begins the shaping process and removes any nicks or damage.
Step 2: Medium Grit Refinement
Use a medium-grit stone (1000#) to refine the edge and remove the heavy scratches left by the coarse stone. At this stage, you should also form a small burr on both sides, ensuring the edge is properly aligned and ready for polishing.
Step 3: Polishing
Use a high-grit stone (6000–8000#) to polish and smooth the blade, preparing it for the final finish.
Step 4: Finishing
Use 1–2 natural stones to bring the edge to its sharpest, smoothest finish. Traditionally in the shechita world, both a black and a green stone are used, but one high-quality stone can be sufficient—especially when paired with a premium synthetic set.
KNIFE MAINTENANCE
Step 1: If your knife needs heavy work start here
Use a low-grit stone (220–250#) for fixing nicks, straightening the edge, and performing heavier sharpening.
Step 2: If your knife needs medium work start here
Use a medium-grit stone (1000#) for fixing light nicks, light sharpening, and refining the edge by removing coarse scratches.
Step 3: If your knife needs light work start here
Use a high-grit stone (6000–8000#) for minor sharpening and polishing, smoothing the blade and preparing it for finishing.
Step 4: Finish here
Use 1–2 natural stones for the final polish and to bring the edge to peak sharpness.
SHARPENING ANGLE
There are many approaches to sharpening angles. We recommend two:
- Low angle (~11.25°) – For creating a fine, sharp edge
- High angle (~22.5°) – For refining and strengthening the edge
These angles provide excellent results for shechita knives and are the standard we train our students to use.

SYNTHETIC SHARPENING STONES
We offer both basic and premium-grade synthetic sharpening stone sets. While the basic set is effective, we strongly recommend the premium set, which lasts significantly longer and produces superior results. It’s the same set we provide to our students.
SYNTHETIC STONE SET INCLUDES:
- Low Grit (220–250#) – For creating an edge, removing nicks, and fixing damage
- Medium Grit (1000#) – For removing coarse scratches and refining the edge
- High Grit (6000–8000#) – For final polishing and smoothing
- Flattening Stone – Keeps your sharpening stones level and effective, extending their lifespan
- Diamond Stone – For prepping and cleaning your stones
NATURAL FINISHING STONES
Natural stones are used for the final, ultra-fine polish. They significantly enhance sharpness and smoothness but must be handled with care—contamination can easily cause a nick, and sharpening at the wrong angle can dull the blade.
We provide grit estimates, but actual grit varies naturally between stones.
Each natural stone comes with a piece of sandpaper for cleaning and prepping the surface. Some people prefer using a 1000# stone or polishing stones for prep, but we recommend sandpaper.
AVAILABLE NATURAL STONES:
- American Finishing Stone – ~10,000+ grit
- Black Finishing Stone – ~10,000+ grit
- Green Finishing Stone – ~15,000–20,000+ grit
Sharpening a shechita knife takes time, discipline, and the right instruction—but once mastered, it becomes one of the most rewarding parts of the craft. With the right tools, a sound method, and proper training, even the most daunting edge can become razor-sharp and ready for avodat kodesh


