

From The Shop


Type:
Professional Poultry Knives


Type:
Professional Sheep Knives


Type:
Synthetic Sharpening Stone Sets


Type:
Professional Poultry Knives
Type:
Professional Sheep Knives
Type:
Synthetic Sharpening Stone Sets


Kosher Cuts Blog

The 4 Biggest Mistakes Modern Shochtim Are Making
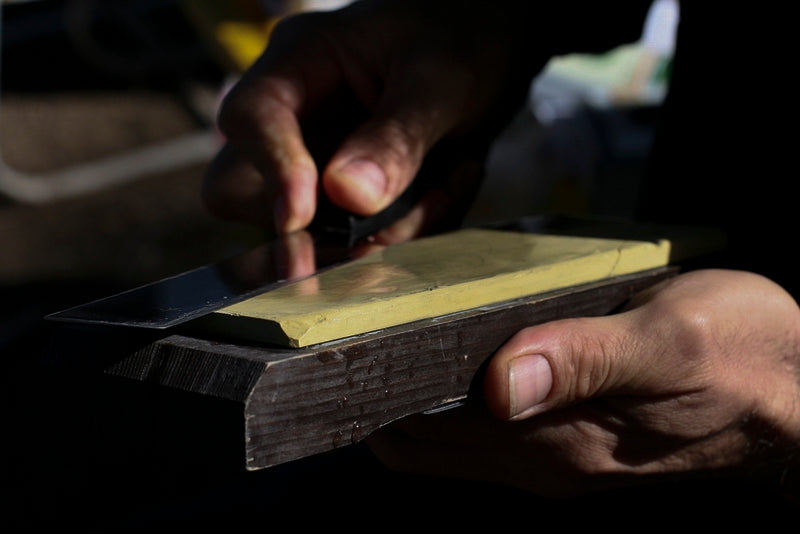
The 4 Biggest Mistakes Modern Shochtim Are Making Shechita is a mesorah built on precision, discipline, and clarity in halacha. But like any craft, misunderstandings creep in—especially when ideas are passed down without being carefully checked against the sources or practical reality. In our shechita training, we consistently see a few recurring mistakes that hold people back, create counter productive “chumros”, and in some cases even lead to worse outcomes for both the animal and the kashrus of the shechita. Here are three of the most common issues—and what to do about them. 1. “Monkey” Knife Sharpening Probably the most concerning trend we see today is how many shochtim have never actually been taught how to sharpen a knife. Instead, they’re given a set of instructions: take this stone, do a certain number of strokes on one side, switch sides, then move to the next stone. Repeat the process and you’re done. We call this “monkey knife sharpening.” Just go through the motions—without understanding what you’re doing or what you’re trying to achieve. But sharpening isn’t about counting strokes. At its core, sharpening a chalaf means forming a proper bevel by creating a burr. That burr is the clearest indication that you’ve apexed the edge and done the work correctly. Without understanding how to raise and control a burr, you’re not really sharpening—you’re just mimicking the motions of sharpening. And that’s exactly what we’re seeing. Shochtim who can follow a routine, but don’t actually know how to diagnose, fix, or truly sharpen a knife. In fact, because they were never taught properly, we often meet people who have spent months unable to get a knife truly sharp or smooth enough—simply because they were never shown what to look for or how to get there. The reality: If you haven’t been taught how to create a burr and build a proper edge, you haven’t been taught how to sharpen—you’ve been taught how to imitate it. 2. Avoiding Low-Grit Stones (and Hurting Your Knife Because of It) We’re seeing a growing trend of shochtim who have never been trained to use low-grit sharpening stones (around 220–250 grit). That’s a serious gap. At the most basic level, all sharpening stones do one thing: they create scratches. Lower grit stones have larger particles that create larger scratches; higher grit stones have smaller particles that refine those scratches into a smoother edge. Low-grit stones are not for polishing—but they are essential for: Establishing a proper bevel Repairing nicks Fixing uneven edges Without them, a damaged or worn chalaf can become nearly impossible to fix efficiently. Trying to do that work on a 1000+ grit stone can take hours—or simply won’t work. The reality: Confidence with low-grit stones makes you a far more capable shochet. They’re not optional—they’re foundational. 3. Misunderstanding Derasa: “You Can’t Use Pressure” One of the most widespread misconceptions is that applying pressure during shechita is inherently a problem of derasa. It’s not. In the Shulchan Aruch (Yoreh Deah 24), derasa is defined by how the cut is performed—specifically, that the shechita must be done with holacha v’hova’ah (a back-and-forth motion). A chopping action (derisa) invalidates the shechita because it lacks this slicing motion. There is no discussion of “how much pressure” is too much, nor any measurement given. The Rema in Yoreh Deah 24-5 adds that if one completely severs a bird’s head in one motion, we are concerned for derasa. But the concern is not the force itself—it is that such a cut suggests the shochet may not have used the required back-and-forth motion at all. Notably, the Shulchan Aruch himself does not assur such an animal, ostensibly because there is no actual proof that the butcher didn’t use a back and forth motion just because the head was cut off. If derasa was a pressure issue, then wouldn’t using enough pressure to cut the animal’s head off be the greatest measure of force that was possible to use and obviously be derasa according to all the de’os? The result of this misunderstanding? Shochtim who barely apply pressure, “playing violin” with the knife—and sometimes failing to perform a proper shechita at all. The reality: A shochet should use whatever pressure is necessary to achieve a smooth, continuous shechita with proper holacha v’hova’ah. The focus is on motion, not artificially limiting force. 4. Shechting Too Low on the Neck (Especially in Waterfowl) While less common than the first two, this mistake can have serious consequences—particularly with certain species. The prohibition of hagrama—cutting outside the valid area—is discussed in the Shulchan Aruch (Yoreh Deah סימן כ׳–כ״א), where the proper מקום שחיטה on the neck is defined and boundaries are established. The Rema advises aiming toward the middle of the neck to avoid straying into hagrama. But in practice, applying this too rigidly can create real problems. Different animals respond very differently depending on where they are shechted: Smaller animals (hens, small birds, sheep): the middle of the neck is generally effective. That said, even here we prefer aiming toward the bottom of the upper third of the neck. This helps reduce the chance—though less common—that an animal does not expire, and it also makes the simanim easier to check. Roosters, cattle, turkeys: when shechted too low, they may remain conscious longer, and in some cases blood flow can become obstructed—leading to improper death and the need for intervention and possible kashrut issues as a result. Waterfowl (ducks, geese): shechting in the middle of the neck will leave them alive for 5–10+ minutes, which is both inhumane, terrible to watch, and causes kashrus concerns. These animals require a much higher shechita to ensure a proper outcome. There are people who will start in the middle of the neck of fowl and on a shallow angle and then finish their shechita towards the top of the neck and this can work quite well on certain animals. Ultimately (no matter how you shecht) going too high also introduces risks of hagrama –this isn’t guesswork. The reality: Proper placement is species-specific and must be learned from a qualified, experienced shochet—not from general rules alone. If animals are not expiring quickly and cleanly, that’s a sign something is off. Closing Thoughts The common thread behind all of these issues is a lack of proper, hands-on training. Too many shochtim today are learning without strong, experienced guidance. They’re picking up bits of halacha or technique, but not developing the real-world skills needed to perform consistent, proper shechita. This is especially problematic now that many new shochtim are learning to shecht away from the factory, where they can't be continuously guided by many older more experienced shochtim and supervisors. Shechita is not something you learn from theory alone. To become proficient, a shochet needs: A skilled, experienced teacher who has done this work in the field Training in a full range of sharpening skills, including proper use of low-grit stones A clear, accurate understanding of core halachos like derasa and how they actually apply in practice Hands-on experience learning how different animals behave and how shechita must be adjusted for each one Without that foundation, problems are inevitable. If you’re serious about training properly in shechita, learn more about our offerings on our Shechita Traning page.
Learn more
Knife Sharpening for Shechita
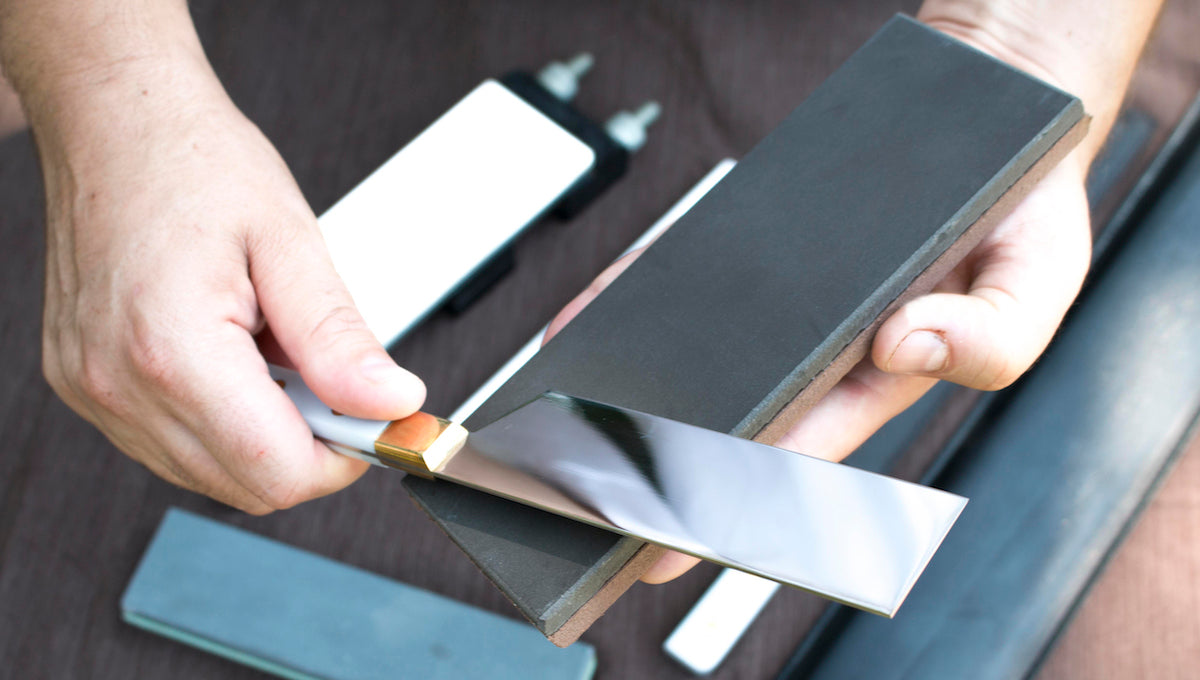
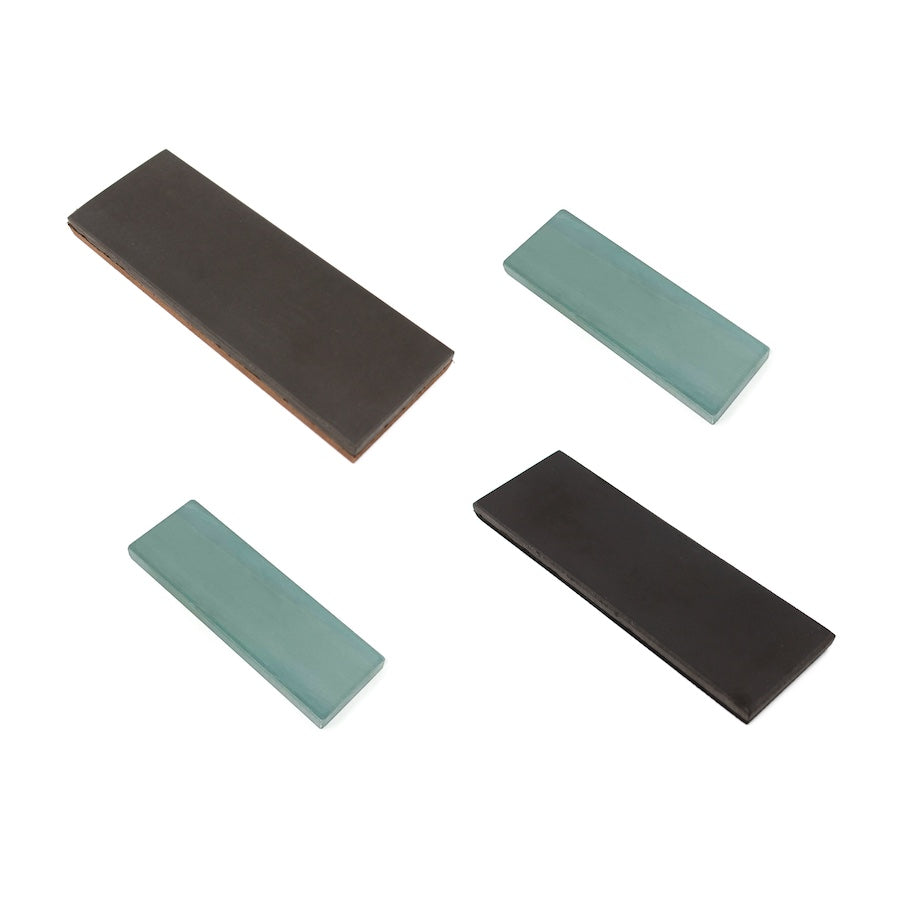
Sharpening a shechita knife (aka chalof or chalif) is a specialized skill that requires precision, patience, and the right tools and methods. This post provides an overview of the tools and techniques used for knife preparation and ongoing maintenance. While it covers many important details, it is does not remotely cover everything you need to know. If you’re just interested in general knife sharpening or not planning to perform proper kosher slaughter, online tutorials may be enough. But if you’re looking to become a lay or professional shochet, hands-on training is just as essential as learning the halachos. Knife sharpening is arguably the hardest part of shechita—and the quality of your teacher can make all the difference. We’ve seen many students waste months going in circles with teachers who don’t know how to transmit the information effectively, only to come to us and start over from scratch. With the right guidance, most of our students learn to sharpen properly in just 5 to 15 hours! Regardless of who you learn from, we strongly recommend learning from a qualified shochet who understands how to properly form a burr. If your teacher doesn’t know how to make a burr, find someone else. If a shochet doesn’t understand how to make a burr (and sadly there are many who do not) they don’t understand the very basics of knife sharpening. KNIFE PREPARATION Safety First! Before we get into the details of shechita knife sharpening, it’s important to address a major safety concern commonly encountered in the kosher slaughter world. Unlike in general knife sharpening—where the stone is typically placed on a table—it’s standard practice during shechita knife prep for the shochet to hold the sharpening stone in one hand. This method carries significant risk. If sharpening this way, always wear a cut-resistant glove on the hand holding the stone. Step 1: Make a BurrUse a low-grit stone (220–250#) to form a burr on both sides of the edge. This begins the shaping process and removes any nicks or damage. Step 2: Medium Grit RefinementUse a medium-grit stone (1000#) to refine the edge and remove the heavy scratches left by the coarse stone. At this stage, you should also form a small burr on both sides, ensuring the edge is properly aligned and ready for polishing. Step 3: PolishingUse a high-grit stone (6000–8000#) to polish and smooth the blade, preparing it for the final finish. Step 4: FinishingUse 1–2 natural stones to bring the edge to its sharpest, smoothest finish. Traditionally in the shechita world, both a black and a green stone are used, but one high-quality stone can be sufficient—especially when paired with a premium synthetic set. If you’re preparing a knife for the first time, we recommend starting with one of our beginner's knives. These more affordable knives are ideal for practice and can later be kept as a reliable backup. Practicing on a high-end professional knife is not only a waste of money—it can also damage a tool that’s meant to last for years. KNIFE MAINTENANCE Step 1: If your knife needs heavy work start hereUse a low-grit stone (220–250#) for fixing nicks, straightening the edge, and performing heavier sharpening. Step 2: If your knife needs medium work start hereUse a medium-grit stone (1000#) for fixing light nicks, light sharpening, and refining the edge by removing coarse scratches. Step 3: If your knife needs light work start hereUse a high-grit stone (6000–8000#) for minor sharpening and polishing, smoothing the blade and preparing it for finishing. Step 4: Finish hereUse 1–2 natural stones for the final polish and to bring the edge to peak sharpness. SHARPENING ANGLE There are many approaches to sharpening angles. We recommend two: Low angle (~11.25°) – For creating a fine, sharp edge High angle (~22.5°) – For refining and strengthening the edge These angles provide excellent results for shechita knives and are the standard we train our students to use. SYNTHETIC SHARPENING STONES We offer both basic and premium-grade synthetic sharpening stone sets. While the basic set is effective, we strongly recommend the premium set, which lasts significantly longer and produces superior results. It’s the same set we provide to our students. SYNTHETIC STONE SET INCLUDES: Low Grit (220–250#) – For creating an edge, removing nicks, and fixing damage Medium Grit (1000#) – For removing coarse scratches and refining the edge High Grit (6000–8000#) – For final polishing and smoothing Flattening Stone – Keeps your sharpening stones level and effective, extending their lifespan Diamond Stone – For prepping and cleaning your stones NATURAL FINISHING STONES Natural stones are used for the final, ultra-fine polish. They significantly enhance sharpness and smoothness but must be handled with care—contamination can easily cause a nick, and sharpening at the wrong angle can dull the blade. We provide grit estimates, but actual grit varies naturally between stones. Each natural stone comes with a piece of sandpaper for cleaning and prepping the surface. Some people prefer using a 1000# stone or polishing stones for prep, but we recommend sandpaper. AVAILABLE NATURAL STONES: American Finishing Stone – ~10,000+ grit Black Finishing Stone – ~10,000+ grit Green Finishing Stone – ~15,000–20,000+ grit Sharpening a shechita knife takes time, discipline, and the right instruction—but once mastered, it becomes one of the most rewarding parts of the craft. With the right tools, a sound method, and proper training, even the most daunting edge can become razor-sharp and ready for avodat kodesh
Learn more
The Five Disqualifying Acts
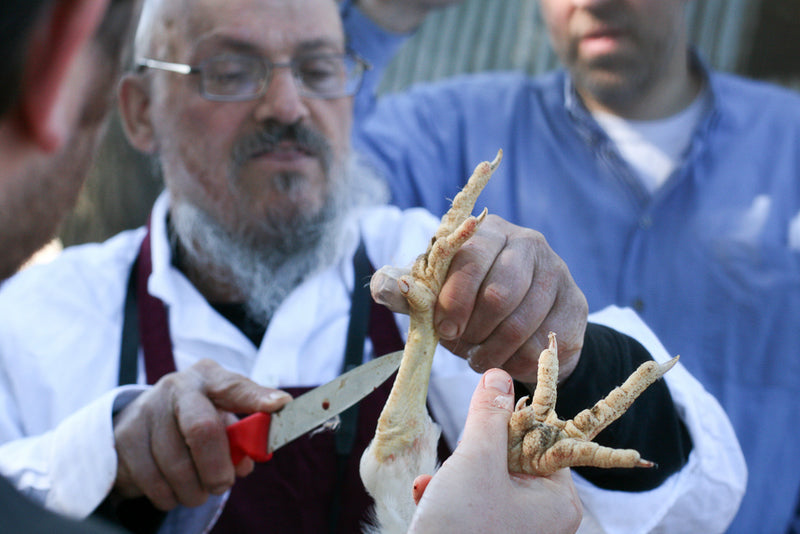
There are five primary acts that will disqualify a kosher slaughter. In Hebrew, these are called the ḥamisha poslei shechita (the five disqualifying acts): Shehiya / Pausing – Any pause during the incision renders the meat non-kosher. The knife must move in one continuous, uninterrupted motion. Chalada / Covering – The knife must be drawn visibly across the throat. It may not be stabbed into the neck or obstructed by fur, feathers, or any other barrier. Drasa / Chopping – The cut must be performed with a smooth back-and-forth sawing motion, not by pressing down or chopping as one would cut a pumpkin or turnip. Hagrama / Misplaced Cut – The incision must be made within the correct area of the throat: roughly below the vocal cords and above the base of the neck. Ikur / Tearing – If the trachea or esophagus are torn rather than cleanly cut, the slaughter is invalid. This usually results from a nicked or improperly sharpened knife. These five prohibitions are the foundation of the laws of shechita. Established thousands of years ago, they are still followed by kosher slaughterers today. As the Shulchan Aruch (Yoreh De’ah 23:1) states: “Any butcher who does not know the laws of shechita—it is not permissible to eat from his slaughter. And these are the laws: shehiya, drasa, chalada, hagrama, and ikur.” Modern animal welfare research has affirmed their wisdom. Temple Grandin, a leading expert in humane livestock handling, found that when these laws are properly observed, an animal’s reaction to the cut is drastically reduced or eliminated altogether. It’s remarkable that these ancient laws have been validated by modern science. If you’re beginning to study kosher slaughter, the ḥamisha poslei shechita are the very first principles to master. * In studies, there was either no reaction or the reaction was equivalent to that of an animal receiving a vaccine or having a flag waved in its face. (Grandin Regenstein 1994)
Learn more
The Shechita Knife
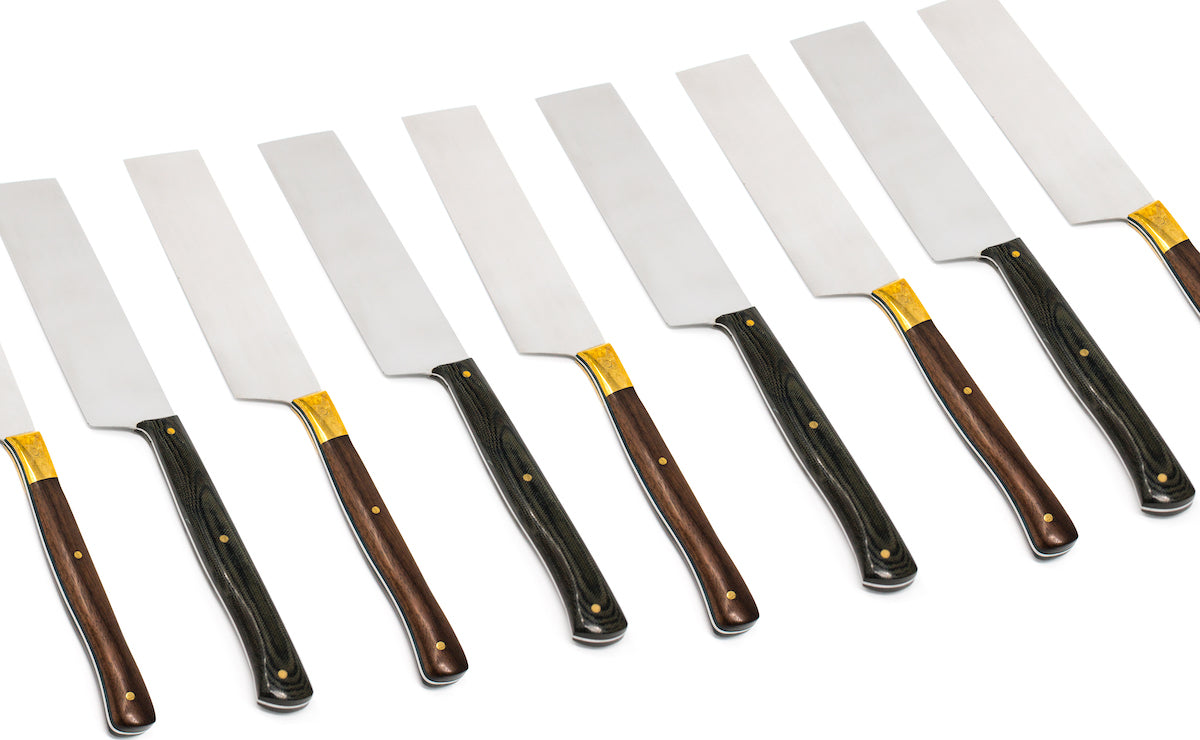
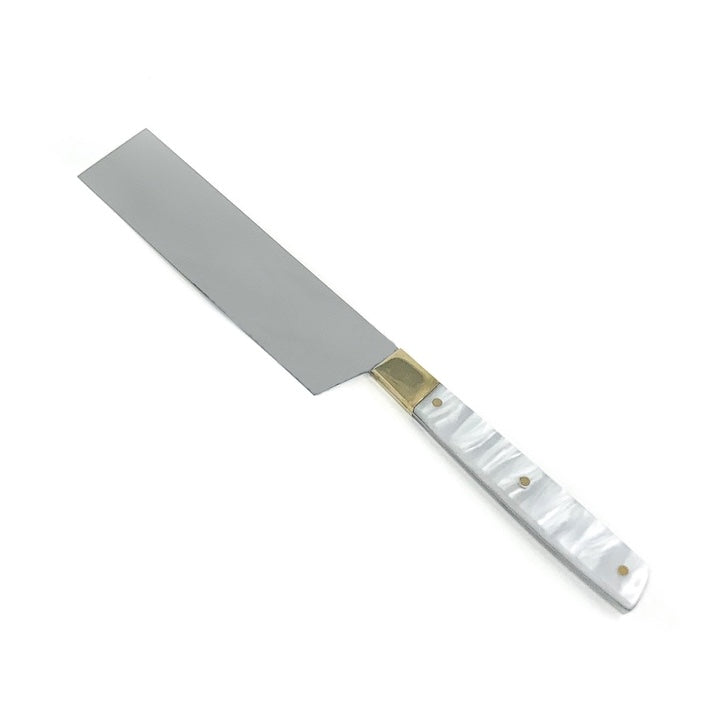
The shechita knife—often referred to as a chalif (chalef/chalof) or sakin—is a specially designed, custom-made tool. Its unique design, maintenance, and use help the shochet avoid performing one of the hamisha poslei shechita (the five disqualifying acts). If you’re not yet familiar with these, you’ll want to read our post on them before continuing with this article. Knife Design A kosher slaughter knife must be at least twice the length of the animal’s neck. This ensures the shochet has enough space to make a smooth sawing motion, rather than chopping down on the neck, which would disqualify the cut through drasah (pressing). Following this tradition, we label every knife in our shop according to the animal it is best suited for. Additionally, each knife is squared at the end to prevent stabbing into the animal’s neck (ḥaladah). Pictured below are our Beginner’s Poultry Knife and Professional Shechita Knives for poultry, sheep, and cattle. Sharpening and Maintenance Unlike most knives, kosher slaughter knives rarely come with a finished edge. Instead, the shochet must set the edge by hand. This ensures the blade is ultra-sharp and customized to the shochet’s preferred angle. For that reason, all of our knives are sold with either a basic machine edge or no edge at all, requiring hand-sharpening before use. Shochtim are expected to put the edges on their own knives, and anyone without sufficient training should seek proper shechita instruction from an experienced teacher before attempting this. The initial edge, as well as ongoing maintenance, is created using a progression of wet sharpening stones: typically a ~250 grit stone, a 1000 grit stone, a 6000–8000 grit polishing stone, and often one or two natural finishing stones. Complete sets—including flattening and cleaning stones—are available in our shop. Alongside sharpening, shechita knives must be checked frequently for absolute smoothness. This prevents tearing of the neck, which would disqualify the slaughter through ikkur (tearing). After sharpening and between animals, shochtim test their blades by carefully running a fingernail across the edge to detect nicks or roughness. This is a delicate and potentially dangerous process that should only be undertaken with proper training. Purchasing a Shechita Knife If you’re buying a chalif for the first time, we recommend starting with our Beginner’s Shechita Knife for practice. Once you’ve mastered sharpening, you can upgrade to one of our Professional Shechita Knives. Finding kosher slaughter knives in the United States used to be difficult, but today you can source just about any style you need directly through our shop.
Learn more